How to Make Salt Dough Ornaments - Recipe, Tips & Tricks! (With Video)
Mikaela EganSo you want to get crafty and set up an activity for the kids, and you've landed on ornament making! You might be wondering what material to use?!
Let's talk about Salt Dough! 🥣
My favourite medium for ornament making has to be salt dough. I've always found it to be one of the strongest once set and sealed and easiest to work with. For me, the easier is it to work with and reshape if I make a mistake are huge pluses! This may be seem counterintuitive to other peoples experiences - people might think clay is surely stronger than salt dough (I thought the same at first!), and it might be, depending on which brand you use and your method. But so far I have found that my salt dough ornaments are harder to break than the air dry clay ones I've made (and we do still love air dry clay).
What is Salt Dough?
Salt dough is a classic kids craft - a quick google search and you'll find 100s of blogs, recipes, tips and tricks on making salt dough ornaments. It's a different to playdough in texture and consistency - it's denser and not as soft and squishy as playdough. This makes it perfect for making ornaments and other craft activities.
Why We Love It
It's a great kid friendly recipe that can be made with just 2 ingredients you likely already have in your pantry at home - flour and salt. It's easy to make, knead, shape, mold and cut into shapes. I particularly love that if you want to start over it's very easy to work with so just like with playdough you can roll and squish it back into a ball and roll it back out and start again. This comes especially in handy if you are using our one piece dough cutters - more on that in tips & tricks below.

The recipe we use:
-
2 cups All Purpose Flour
-
1 cup Salt
-
1 1/3 cups of hot water (from the kettle)
Materials you'll need
- Medium size mixing bowl
- Spoon or spatula to mix ingredients with
- Measuring cups
- Silicone mat or baking paper
- Baking tray (if oven drying)
- Small paint brush, drinking straw or skewer (for hanging holes)
- Acrylic paints (our recommendations below)
- Sealant (we use Mod Podge).
Method
- In a medium mixing bowl, thoroughly mix flour and salt together
- Pour in hot water and stir - at this point it might look like a hot mess but don't worry, trust the process!
- Once the dough has cooled enough to touch, give it a really good knead (you can also use gloves here). Do the stick test! if the dough sticks to your hands easily then you want to add just a smidge more flour and test again (see video at 0.28). If your dough is too dry add a little bit more water.
- Roll dough out on your silicone mat or baking paper - to the thickness you want your ornaments to be (I find 0.5-1cm is pretty good, too thick and they will take ages to dry)
- Cut & stamp your shapes
- Peel away excess dough
- Using the end of a paint brush or straw poke holes in the top for hanging
- Put the ornaments on a tray lined with baking paper
- You can leave these to air dry or bake them in the oven to speed up drying time
- If baking in the oven make sure you set your oven on the lowest temperature and let them bake for 3-5 hours. If your temp it too high they will puff up! If air drying, this will take 3-5 days! Maybe more.
- Once they're finished baking/drying, let them cool and decorate!
- Seal them - this will help them last a long time and protect your paint
- Hang them!
Tips & Tricks
Using Our Cutters & Stamps
- Our 2-piece cutters work best to get a clean cut & stamp, but you can use our one piece cutters
- Take a look at my technique in the video - I get the best results when I first place the cutter, then stamp, then lift the stamp off, gently twist the cutter in the dough, then remove the cutter
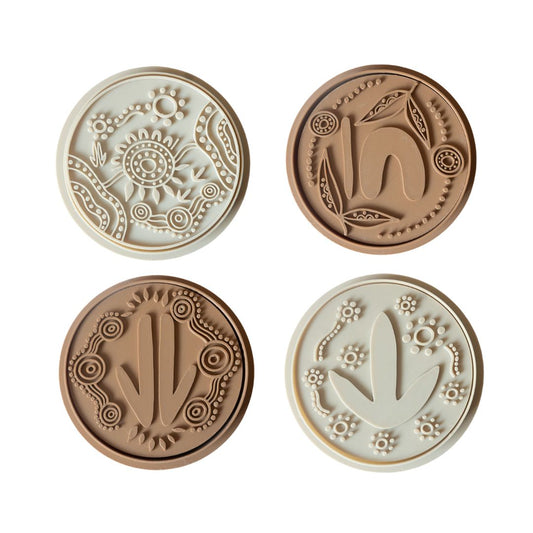
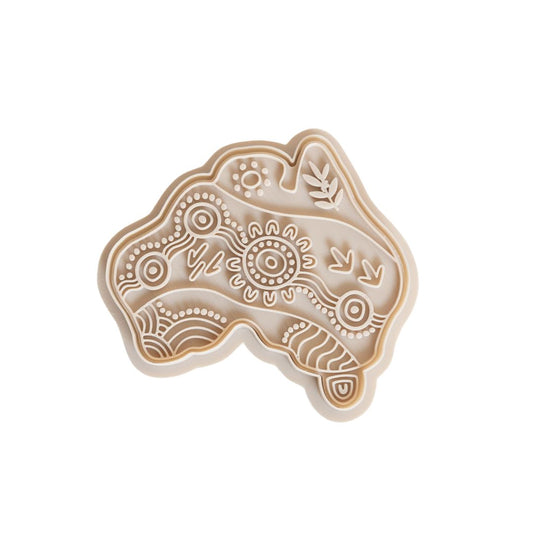
- For intricate designs like our long neck turtle and yabby, dust some flour over the rolled out dough before you stamp - this will make it easier to lift the cutter off without it sticking
- Give the cutter a little wiggle and peel it off from one of the side edges (see video for techniques)
General tips
- You can colour your dough before drying - using food colour, bush tucker powder or other natural food powders. Just note that the colour will fade quite a bit if using natural materials.
- To get a really smooth dough, blitz your table salt for 10-15 seconds in something like a nutribullet, this will help the salt dissolve better when you add the hot water (this ones our top tip!)
- We just use regular acrylic paints (I love the brand Jo Sonja) but you could use any paints, watercolours look really nice too!
- We seal with Mod Podge but you can use any non toxic paint sealer or even watered down PVA (that's basically Mod Podge 😉)
- Make sure to use a thin layer of sealant and if using Mod Podge make sure to get rid of any spots where it's thick and pooling on your ornament. I use a clean brush at the end to do this (see video).
- Lastly, don't forget to make some plain ornaments with your cutters and decorate with your own design! 💚
Caring for your ornaments
If you want your ornaments to last a long time, make sure to seal them and then when not on display store them flat in a cool, dark environment free of moisture. The salt helps to preserve the mixture and the sealant helps to keep them strong and looking great.
Get Creative! 💫
Use pretty ribbon, natural twine, beads and seeds to finish your ornaments!
Enjoy!